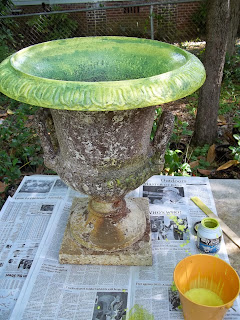
Restoring the grounds at the Burt Stark house began with the moving and restoring of an oddly placed, painted encrusted urn. The paint was 1/8 of an inch thick in places, and most was chipped and peeling horribly. 4 hours of slow chipping and scraping revealed details on the urn that had been covered and lost for decades. I saw no evidence that this urn was ever any color other than white, but I will be painting this final product black as all the other ironwork on the property is black.
Layers and layers of paint had completely hidden the fine details of the beautiful urn.
The top of the urn clearly had a pattern but it could not easily be seen through the layers of paint.
Carefully and slowly chipping away chunks of paint revealed a variation of the egg and dart design.
One problem few might have noticed was that the urn was turned on its base.
A simple loosening of the connections, a quick twist, and the base was set to right.
Much better to my eyes. I plan to set the urn on a brick plinth so straightening the base makes sense to me. This is the finished stage. The paint you see is well adhered and has been scraped smooth.
To seal the cast iron I used a product named Rust-Cure. The paint reacts with the exposed rust to make it inert and seal it. The final color will not be yellow, but it did make for some conversations.
So here we are four hours into the restoration. The final product shows many details beginning to emerge, they were lost to time and layers of paint before.
Final product upside down waiting to begin painting the black on the undersides first. Notice the drain hole. There are three. When ready to be planted I will begin with a layer of gravel and landscape fabric to keep the soil in the planter.


